3D PLM Enterprise Architecture |
User Interface - Frame |
Application Property AccessHow to add a property page for your application properties |
| Technical Article | ||
AbstractThe Tools/Options menu displays a dialog box containing a workshop and workbench list, presented by solution, and associated property sheets. For each workshop or workbench, the associated property sheet gathers the property pages that enable the end user to access and modify persistent properties for the documents edited using this workshop or workbench and saved in the end user's setting files. This article explains how to create and integrate your own property sheet and your own property pages to this dialog box. |
A property sheet is a tabbed dialog box, each tab containing a property page. It enables the end user to work with many properties gathered in a single place, rather than to display several dialog boxes accessed each from a different menu. Each property page contains various controls to set values or options for the property. When the end user clicks on a tab, the controls for the property are displayed and the end user can alternatively display different property pages by clicking on different tabs. A property page accessed from the Tools menu is either of general purpose or attached to a workshop or workbench. It manages persistent parameters that the end user can modify or reset to their default values. These parameters are dedicated to application management and are stored in setting files. Other property pages can exist, namely those dedicated to a given object and accessed using Edit Properties, or from the Properties item of the contextual menu triggered from an object. These property pages manage parameters or attributes that the end user can assign to the objects and are stored with the objects in the document.
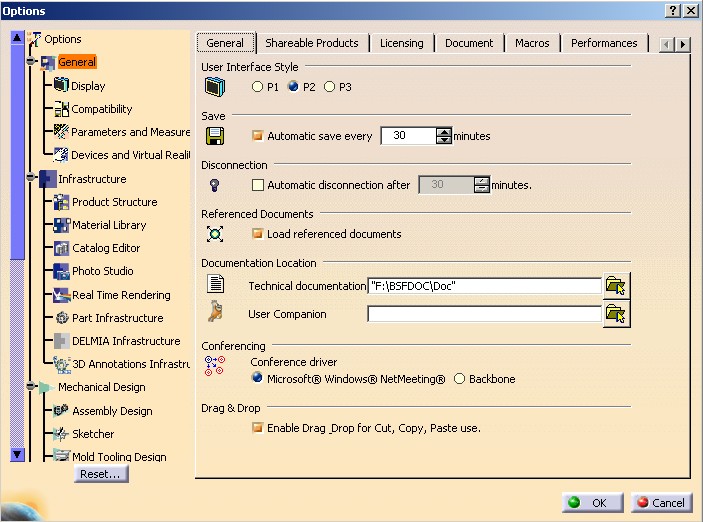
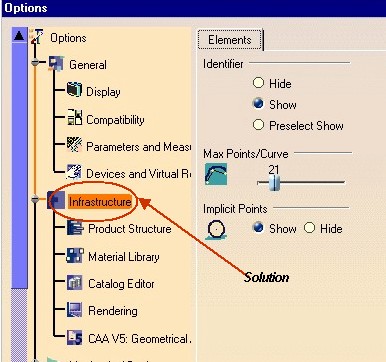
The Tools Options property sheet dialog box displays the list of the currently available workshops and workbenches along with the associated property pages.
The first item in the workshop and workbench list is named "General" and is not really a workshop. It gathers property pages common to all applications. Clicking on a workshop or workbench name displays the associated property sheet. Below is the property sheet associated with the Material Library workbench . It includes one property page.
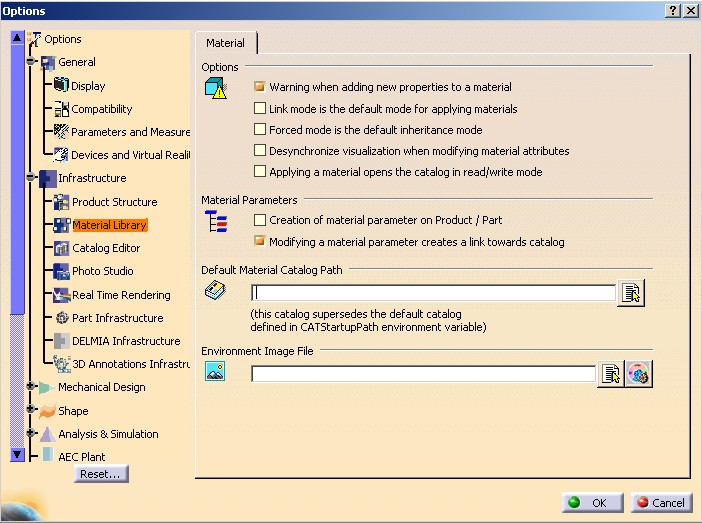
Each property page displays controls to set parameter values or working options for a given property or for several.
The dialog box works as follows:
[Top]
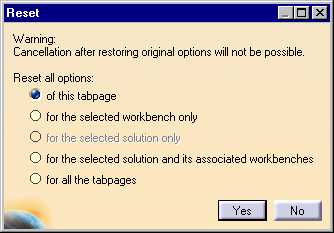
Properties displayed in a property page are stored in a setting file. A property page can use several setting files, but a setting file can not be used for several property pages. The reason is easy to understand: If you perform a reset in the current page, in choosing the first option of the previous dialog box, you will modify setting attributes displayed in another pages.
In memory the setting file is represented by a setting repository, an instance of the CATSettingRepository class [1]. A setting repository must not be used directly, it must have a setting controller [2]. This setting controller manages and controls the access to the setting repository. This controller enables also to shared the internal representation from the logical parameter.
[Top]
This is described using an example that can be found in the CAACafEltToolsOptions.m
module of the CAACATIAApplicationFrm.edu framework [3].
In this example, properties common to any geometric elements are gathered in a
property page.
To create a property page, you need to create:
You need first to create a factory interface and then implement it to create the property page factory. This factory creates the property page editor.
Let's detail the tasks to do to create a property page, whose editor is CAAPPEdt.
You need:
[Top]
You'll now create the class for the property page. This class derives from the CATEditor class, implements the CATIUserSettings interface and overrides the methods shown in the diagram below.

These methods are those of the CATIUserSettings interface and are either pure virtual or empty in their CATEditor implementation. You should provide their body to make them play the following role:
BuildEditor instantiates the associated dialog classSetUserSettingValue sets the values and options in the
property pageResetUserSettingValue resets the values and options in the
property page using the default ones. These default values are those set in
the code in none administrator environment.CommitModification saves in the setting file the
modifications made to values and options in the property page.CancelModification cancels the modifications made to values
and options in the property page and restore the previous onesThe methods BuildEditor, and SetUserSettingValue
are executed in this order when instantiating the property page. The methods ResetUserSettingValue,
CancelModification, and CommitModification are
executed when the end user clicks Reset, OK, and Cancel respectively.
[Top]
To set a NLS title to the property page, you have to create a CATNls file
whose prefix is the property page editor class name. CAAPPEdt.CATNls
for the editor of the previous section. This file contains:
TabPage.Title = "xxx" ; |
where:
TabPage |
A required keyword for property pages |
Title |
The keyword for titles |
Example:
TabPage.Title = "Elements" ; |

[Top]
To integrate a property page in a property sheet, you have to create a CATRsc
file whose prefix is the property page editor class name. CAAPPEdt.CATRsc
for the editor of the previous section.
The property page can be integrated in a property sheet of a solution or in a property sheet of a workbench. In some cases, you can duplicate the property page in several property sheet. You can also precise a priority of the property page in the property sheet.
TabPage.SolutionName= "xxx" |
where:
TabPage |
A required keyword for property pages |
SolutionName |
The submenu of the Start menu where your workshop or workbench
appears. This name is defined in the CATRsc file of your workshop or
workbench within the keyword Category. The list of the
solutions is given at the end of the document "Creating Resources
for Workshops or Workbenches" [5] |
Example:
TabPage.SolutionName= "Infrastructure" |
TabPage.SolutionName= "xxx" TabPage.WorkbenchName= "yyy" |
where:
TabPage |
A required keyword for property pages |
SolutionName |
The submenu of the Start menu where your workshop or workbench
appears. This name is defined in the CATRsc file of your workshop or
workbench within the keyword Category. The list of the
solutions is given at the end of the document "Creating Resources
for Workshops or Workbenches" [5] |
WorkbenchName |
The identifier of your workshop or workbench, set using the NewAccess
macro in the CreateWorkshop or CreateWorkbench
method [1] |
Example:
TabPage.SolutionName= "Infrastructure" TabPage.WorkbenchName= "CAAAfrGeoCreationWkb" |

It is possible to set the property page in several property sheets. To indicate the number of extra page
TabPage.ExtraOccurrenceNb= "N" |
Where N is an integer larger than or equal to 1.
TabPage.SolutionName.Extra.N= "xxx" |
where:
TabPage |
A required keyword for property pages |
SolutionName |
The submenu of the Start menu where your workshop or workbench
appears. This name is defined in the CATRsc file of your workshop or
workbench within the keyword Category. The list of the
solutions is given at the end of the document "Creating Resources
for Workshops or Workbenches" [5] |
| Extra | A required keyword for extra pages |
| N | The number of the extra page |
TabPage.SolutionName.Extra.N= "xxx" TabPage.WorkbenchName.Extra.N= "yyy" |
where:
TabPage |
A required keyword for property pages |
SolutionName |
The submenu of the Start menu where your workshop or workbench
appears. This name is defined in the CATRsc file of your workshop or
workbench within the keyword Category. The list of the
solutions is given at the end of the document "Creating Resources
for Workshops or Workbenches" [5] |
WorkbenchName |
The identifier of your workshop or workbench, set using the NewAccess
macro in the CreateWorkshop or CreateWorkbench
method [1] |
| Extra | A required keyword for extra pages |
| N | The number of the extra page |
In a property sheet, if any property page has indicated a priority, the alphanumeric order on the NLS title is taken into account. To be independant of the language, you can precise a priority for a property page.
TabPage.PriorityNb= "N" ; |
[Top]
This dialog is a class that derives from CATDlgFrame. A property page is divided in sections. Each section has a title, a separator and eventually an icon.
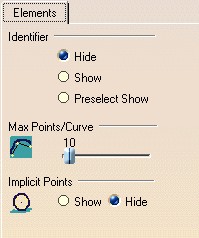 |
This property page contains 3 sections, only the first one has no icon. |
Each section is an instance of the CATDlgToolsOptionsFrame class. A section is a frame. The constructor to use is the following: CATDlgToolsOptionsFrame (CATDialog * iParent, const CATString & iFrameName, const CATString & iIconName, CATDlgSTyle iStyle =NULL) where:
iParent is the property page dialogiFrameName is the internal name of the frame (section)
used for the NLSiIconName is the name of the iconIt is the icon bmp image file name without the bmp extention. If in a CNext/resources/graphic/icons/normal directory you have the I_CAAIconeName.bmp
file, set I_CAAIconeName for iIconName
iStyle the style of the frame (section)
 |
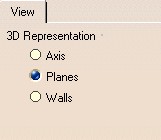
The section contains a visible icon and a bottom invisible separator. |
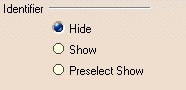 |
The section doesn't contain any icon but all dialog
objects inside this frame (here 3 radio buttons) are shifted as if
there were an icon. |
 |
The property page doesn't contain any frame with icon.
Notice the shorter space between the radio button of this image and
the below image. |
This style must be mixed with the previous styles for the last section of the property page.
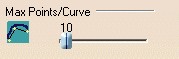
In each section you integrate dialog object, CATDlgRadioButton,
CATDlgSlider etc... These objects are inside a frame inside the section. This
intermediate frame is retrieved thanks to the GetOptionsFrame()
method of the CATDlgToolsOptionsFrame class.
A property page dialog is a special dialog box. It displays parameters which can be controlled by an administrator. The setting file enables this type of management. An administrator can :
To introduce administration in a dialog box, you use CATDlgLock objects. Consider this property page:
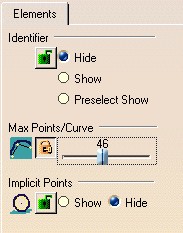 |
If the lock is green, the end user could modify the parameter. If you select the lock, you prevent the modification for the parameter. |
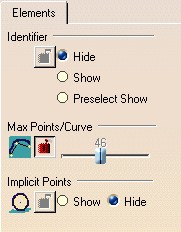 |
The lock in front of the stopped parameter is red, otherwise the lock is grayed. |
Each section must have at least one CATDlgLock but a section which contains several parameters can have several CATDlgLock. In the two cases, it is important:
AddAssociatedDialog method of the CATDlgLock
class.In the CATNls file dedicated to the property page dialog you find:
IdFrame.HeaderFrame.Global.Title ="xxx"; |
where:
| IdFrame | Identifier of the frame, the second argument of the CATDlgToolsOptionsFrame method |
| HeaderFrame.Global.Title | A required keyword |
IdFrame.IconAndOptionsFrame.OptionsFrame.IdWidget.Title = "xxx"; |
where:
| IdFrame | Identifier of the frame, the second argument of the CATDlgToolsOptionsFrame method |
| IconAndOptionsFrame.OptionsFrame | A required keyword |
| IdWidget | Identifier of the dialog object inside de frame |
| Title | A required keyword |
[Top]
When you click F1 in a property page, a documentation is displayed if you have set the TabPage.LongHelpId keyword in the CATRsc file of the property page editor.
TabPage.LongHelpId= "ToolsOptions.xxx.[yyy.]zzz" ; |
where:
Example:
TabPage.LongHelpId="ToolsOptions.Infrastructure.CAAV5GeometricalCreation.Elements"; |
In the documentation directory [5], create an html document and in the CommonId2url.CATNls file, where xxx represents the product line, add the following line:
ToolsOptions.xxx.[yyy.]zzz="ppp"; |
where:
online directory, of
the html document.[Top]
Creating a property page for the Tools/Options menu implies to create a property page editor factory, a property page editor class instantiated by this factory, and to supply a property page dialog class gathering the controls to access the parameters and values you let the end user access and modify.
The property page uses a setting controller, dedicated to a setting repository, to read and save these parameters and values.
Associate with the property page editor, two resource files must be created:
[Top]
| Version: 1 [Jan 2000] | Document created |
| [Top] | |
Copyright © 2000, Dassault Systèmes. All rights reserved.