3D PLM Enterprise Architecture
|
User Interface - Frame
|
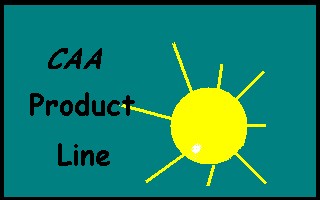
Creating a Product Line Visual Identity
Differentiating your own product line from others |
| Use Case |
Abstract
A product line should be easily recognized from others using some
visual features discerningly chosen, such as its launching icon or splash
screen. This article shows you how to implement the visual identity
components for your product line.
|
What You Will Learn With This Use Case
This use case is intended to show you how to create a load module to launch
the application and how to create the visual identity resources [1]
for a fictitious product line named CAAProductLine.
[Top]
The CAAAfrProductLine Use Case
CAAAfrProductLine is a use case of the CAAApplicationFrame.edu framework that
illustrates the ApplicationFrame framework capabilities.
[Top]
What Does CAAAfrProductLine Do
The CAAAfrProductLine use case creates the load module that launches the
product line application CAAProductLine, and includes all the resources to customize this
product line visual identity.
[Top]
How to Launch CAAAfrProductLine
To launch CAAAfrProductLine, you will need to set up the build time
environment, then compile CAAAfrProductLine along with its prerequisites, set up
the run time environment, and then execute the use case [2].
Do not type the module name on the command line, but type the product name.
[Top]
Where to Find the CAAAfrProductLine Code
The CAAAfrProductLine use case is made of a single source file named CAAAfrProductLine.cpp
located in the CAAAfrProductLine.m module of the CAAApplicationFrame.edu
framework:
| Windows |
InstallRootDirectory\CAAApplicationFrame.edu\CAAAfrProductLine.m\ |
| Unix |
InstallRootDirectory/CAAApplicationFrame.edu/CAAAfrProductLine.m/ |
where InstallRootDirectory is the directory where the CAA CD-ROM
is installed.
With Windows, other files are needed to launch the application from a desktop
shortcut. These files are also located in CAAAfrProductLine.m.
[Top]
Step-by-Step
Creating the visual identity components is divided into the following steps:
Assume the product line is named CAAProductLine.
[Top]
Creating the Main Program to Launch Your Application
To create this main program, you should first create its module directory,
such as CAAAfrProductLine.m. This module directory should contain:
- An Imakefile.mk file like the following:
#
# LOAD MODULE FOR CAAAfrProductLine
#
BUILT_OBJECT_TYPE=LOAD MODULE
#
LINK_WITH=CATApplicationFrame JS0FM JS0GROUP
|
- In the src directory
- A C++ file that only instantiates the CNext class using the product
line name as parameter, such as CAAAfrProductLine.cpp
#include "CNext.h"

CNext Product ("CAAProductLine");
|
- An icon file, named icon1.ico, containing the product line icon to display
as a shortcut to the application in the Windows NT desktop. This icon is
generated using Microsoft Developer Studio, using the Insert Resource dialog
box displayed thanks to the Resource item in the Insert menu

You can choose to import an existing bit map file. Click Import and
select this file.You can also choose to draw the icon. Click New, and the
Graphics and Colors toolbars are displayed
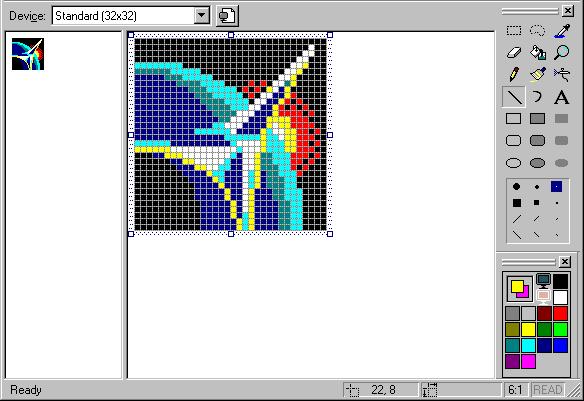
When the icon is created, use Save As to save the icon in the src
directory of your module. Microsoft Developer Studio has also created two
files:
- The Script1.rc file. You just need to add the line shown in bold
typeface to by-pass a Windows bug
//Microsoft Developer Studio generated resource script.
//
#include "resource.h"

#define APSTUDIO_READONLY_SYMBOLS
/////////////////////////////////////////////////////////////////////////////
//
// Generated from the TEXTINCLUDE 2 resource.
//
#include "afxres.h"

/////////////////////////////////////////////////////////////////////////////
#undef APSTUDIO_READONLY_SYMBOLS

/////////////////////////////////////////////////////////////////////////////
// English (U.S.) resources

#if !defined(AFX_RESOURCE_DLL) || defined(AFX_TARG_ENU)
#ifdef _WIN32
LANGUAGE LANG_ENGLISH, SUBLANG_ENGLISH_US
#pragma code_page(1252)
#endif //_WIN32

/////////////////////////////////////////////////////////////////////////////
//
// Icon
//

// Icon with lowest ID value placed first to ensure application icon
// remains consistent on all systems.
IDI_ICON1               ICON    DISCARDABLE     "icon1.ico"

// Add this line to have the icon on the desktop and by-pass a Windows bug
IDI_ICON2               ICON    DISCARDABLE     "icon1.ico"

#ifdef APSTUDIO_INVOKED
/////////////////////////////////////////////////////////////////////////////
//
// TEXTINCLUDE
//

1 TEXTINCLUDE DISCARDABLE
BEGIN
    "resource.h\0"
END

2 TEXTINCLUDE DISCARDABLE
BEGIN
    "#include ""afxres.h""\r\n"
    "\0"
END

3 TEXTINCLUDE DISCARDABLE
BEGIN
    "\r\n"
    "\0"
END

#endif    // APSTUDIO_INVOKED

#endif    // English (U.S.) resources
/////////////////////////////////////////////////////////////////////////////


#ifndef APSTUDIO_INVOKED
/////////////////////////////////////////////////////////////////////////////
//
// Generated from the TEXTINCLUDE 3 resource.
//


/////////////////////////////////////////////////////////////////////////////
#endif    // not APSTUDIO_INVOKED
|
- The resource.h file
//{{NO_DEPENDENCIES}}
// Microsoft Developer Studio generated include file.
// Used by Script1.rc
//
#define IDI_ICON1                       101

// Next default values for new objects
//
#ifdef APSTUDIO_INVOKED
#ifndef APSTUDIO_READONLY_SYMBOLS
#define _APS_NEXT_RESOURCE_VALUE        102
#define _APS_NEXT_COMMAND_VALUE         40001
#define _APS_NEXT_CONTROL_VALUE         1000
#define _APS_NEXT_SYMED_VALUE           101
#endif
#endif
|
Move the resource.h file to the LocalInterfaces directory, and build the
module file using mkmk -u.
[Top]
Providing the Graphic Resources
The graphic resources to provide should be copied into the
CNext\resources\graphic directory or in its subdirectories of the framework
used. They are:
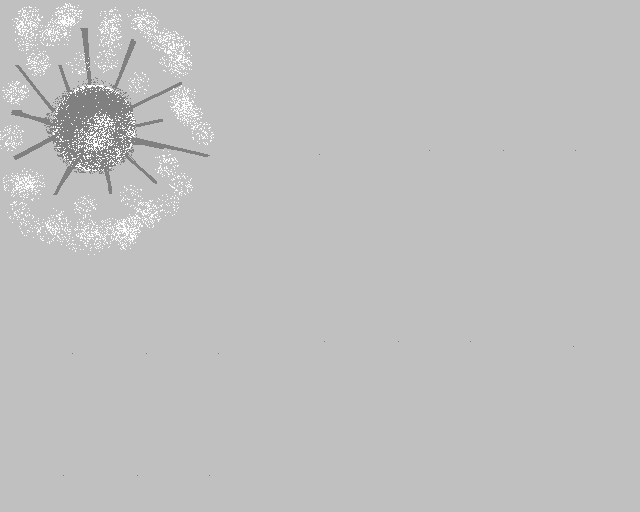
- The product line dialog box background image, available
with Windows NT only. It should be copied in the
CNext\resources\graphic\icons directory. Its characteristics are the
following:
- P1 (CAADecorationP1.bmp): width: 500 pixels; height: 36 pixels;
resolution: 72 pixels per inch; 256 indexed color image

- P2 (CAADecorationP2.bmp): width: 55 pixels; height: 1000 pixels;
resolution: 72 pixels per inch; real color 24 bits image. It is shown
cropped to its lower part

[Top]
Creating the Resource File
The resource file must have the name you choose for the product line, here
CAAProductLine. This file is:
- CAAProductLine.CATRsc refers to the graphic resources provided
// .CATRsc of a product line
// --------------------------------------
ApplicationFrame.Icon.Name  = "CAAProduct";
SplashScreen.Name           = "CAASplash";

// P1 Look
ApplicationLogo.P1.NT       = "CAALogoP1NT";
ApplicationLogo.P1.Unix     = "CAALogoP1IX";
DialogBoxBottom.P1          = "CAADecorationP1";  // Available NT Only

// P2 Look
ApplicationLogo.P2.NT       = "CAALogoP2NT";
ApplicationLogo.P2.Unix     = "CAALogoP2IX";
DialogBoxBottom.P2          = "CAADecorationP2";   // Available NT Only
BackgroundImage.NT          = "CAABackgroundNT";
BackgroundImage.Unix        = "CAABackgroundIX";
|
You can now launch your application using the shortcut in the desktop and see
its different visual identity components.
[Top]
In Short
To provide a visual identity to your product line, you can, with Windows
only, create an EXE to launch your application associated with an icon of your
own that can also be used as a shortcut in the desktop. You can create with UNIX
and Windows text and graphic resources to display with your applications.
[Top]
References
History
| Version: 1 [Jul 2000] |
Document created |
| [Top] |
Copyright © 2000, Dassault Systèmes. All rights reserved.