DMU Kinematics Simulator

Creating a Simple Mechanism


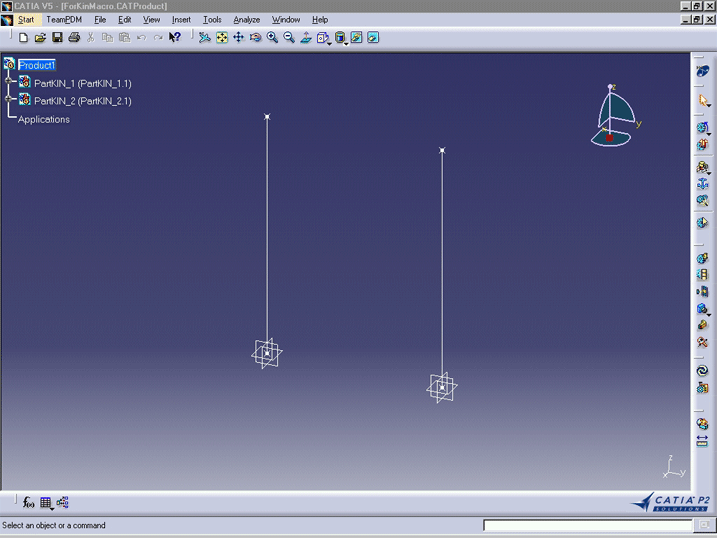
This macro shows you how to create a very simple mechanism, including joint, fixed part and commands, so that you can simulate it afterwards. The macro assumes that a CATProduct has been loaded, with 2 parts, each containing a line object .

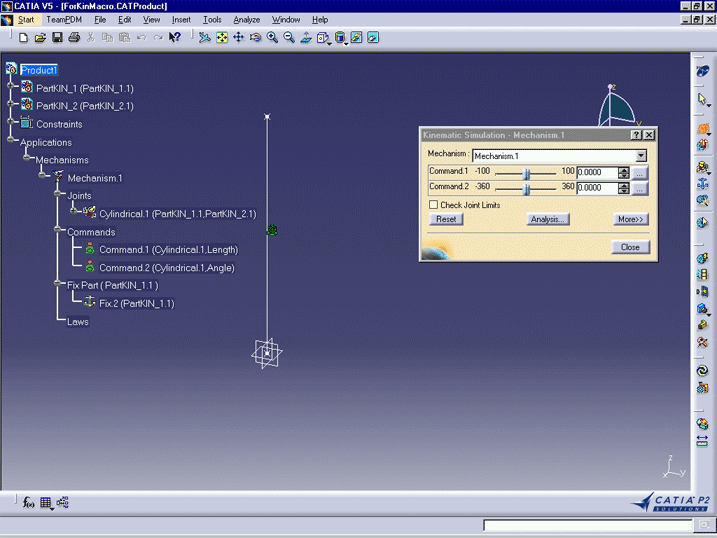
After running the macro, the document contains a mechanism, with one joint, one fixed part, and two commands.


CAAKiiMechanismCreation is launched in CATIA [1]. You need to previously open the provided document.

CAAKiiMechanismCreation.CATScript is located in the CAAScdKiiUseCases module. Execute macro (Windows only).


CAAKiiMechanismCreation includes five steps:

  1. Prolog
  2. Creation of the mechanism
  3. Creation of the fixed part
  4. Creation of the joint
  5. Creation of the commands

Prolog

Some constants are initialized : 

oRootProduct: it represents the root of the product graph. 

oFixedProduct: one of the parts of the assembly. It is initialized with the first child of the root product through RootProduct.Product.Item(1).

Two references are created using a string describing the path from the root product to a geometric object. The syntax for references is described in the Reference object documentation.


Creation of the mechanism

 cTheMechanisms: it represents the mechanism collection for this product. This collection is retrieved using the GetTechnologicalObject method, with the string "Mechanisms",

 The Add method is used on the cTheMechanisms collection to create the oNewMechanism object.

 Some properties and side methods for collections are demonstrated at this level: Count, Item.


Creation of the fixed part

A product is used to define the fixed part of the mechanism, using the FixedPart property.


Creation of the joint

Creating a joint is done by using the AddJoint method on the mechanism. The method requires a string representing the type of joint to be created, and an array of References to geometric objects to be used to locate the joint.

The following table summarizes the strings and geometric objects to be used for the supported joint types.

Note that for example "Line (1)" means that the geometry type must be a line and must belong to the 1st product of the joint.

Joint type Degree of freedom Type string Reference.1 Reference.2 Reference.3 Reference.4 Reference.5 Reference.6 Reference.7 Reference.8
Prismatic 1T CATKinPrismaticJoint Line (1) Line (2) Plane (1) Plane (2) - - - -
Revolute 1R CATKinRevoluteJoint Line (1) Line (2) Plane (1) Plane (2) - - - -
Rigid - CATKinRigidJoint Product (1) Product (2) - - - - - -
Spherical 3R CATKinSphericalJoint Point (1) Point (2) - - - - - -
PointCurve 3R+1T CATKinPointCurveJoint Point (1) Curve (2) - - - - - -
RollCurve 1R+1T CATKinRollCurveJoint Curve (1) Curve (2) - - - - - -
SlideCurve 1R+1T CATKinSlideCurveJoint Curve (1) Curve (2) - - - - - -
Cylindrical 1R+1T CATKinCylindricalJoint Line (1) Line (2) - - - - - -
Screw 1T or 1R CATKinScrewJoint Line (1) Line (2) - - - - - -
Universal 3R CATKinUJoint Line (1) Line (2) Line (1 or 2), optional - - - - -
CVJoint 5R CATKinCVJoint Line (1) Line (2) Line (3) - - - - -
PointSurface 3R+2T CATKinPointSurfaceJoint Point (1) Surface (2) - - - - - -
Planar 1R+2T CATKinPlanarSurfaceJoint Plane (1) Plane (2) - - - - - -
Gear 2R (coupled) CATKinGearJoint Line (1) Line (3) Plane (1) Plane (3) Line (2) Line (3) Plane (2) Plane (3)
Rack 1R + 1T (coupled) CATKinRackJoint Line (1) Line (3) Plane (1) Plane (3) Line (2) Line (3) Plane (2) Plane (3)
Cable 2T (coupled) CATKinCableJoint Line (1) Line (3) Plane (1) Plane (3) Line (2) Line (3) Plane (2) Plane (3)

Notes :
  • for Prismatic Joint : Plane 1 must contain Line 1 and Plane 2 must contain Line 2
  • for Revolute Joint : Line 1 must be normal to Plane 1 and Line 2 must be normal to Plane2
  • for Universal Joint : Connector 3 is the cross-pin axis. It must belong to product 1 or 2 and must be orthogonal to Line (1) or Line (2). it is optional.
  • for CV Joint : the angle between Line (1) and Line (2) must be the same as the angle between Line (2) and Line (3)
  • for Gear Joint : it is seen as a Revolute joint between Product 1 and Product 3, and a Revolute joint between Product 2 and Product 3
  • for Rack Joint : it is seen as a Prismatic joint between Product 1 and Product 3, and a Revolute Joint between Product 2 and Product 3
  • for Cable Joint : it is seen as a Prismatic joint between Product 1 and Product 3, and a Prismatic Joint between Product 2 and Product 3
  • The NbJoints property of the Mechanism allows to get the count of joints.


    Creation of the commands

    In the example, a single cylindrical joint is created. Two commands are required to simulate this mechanism.

    The type name for commands is MechanismCommand.

    Creating a command is done by using the AddCommand method on the mechanism. The method requires a string representing the type of command to be created, and the joint that must be driven.

    The following table summarizes the strings and joints objects to be used for the supported command types:

    Joint type CATKinAngleCommand CATKinLengthCommand
    Revolute YES -
    Prismatic - YES
    Spherical - -
    Cylindrical YES -
    Planar - -
    Rigid - -
    PointCurve - YES
    RollCurve - YES
    SlideCurve - -

    The NbCommands property of the mechanism allows to get the count of commands.


    [Top]


    In Short

    This use case has shown how to create a very simple mechanism, so that it can be simulated. Specifically, it has illustrated how to:

    You can derive a standard mechanism creation for any mechanism structure from this use case plus some knowledge on wireframe and/or knowledgeware macro resources.

    [Top]


    References

    [1] Replaying a Macro
    [2] DMU Kinematics Automation Objects

    [Top]


    DMU Navigator Home DMU Space Analysis Home DMU Kinematics Simulation Home

    Copyright © 2001, Dassault Systèmes. All rights reserved.