|
-
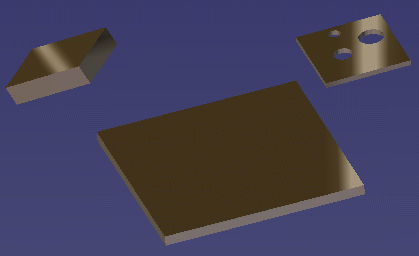
Select one of the materials in the specification tree.
-
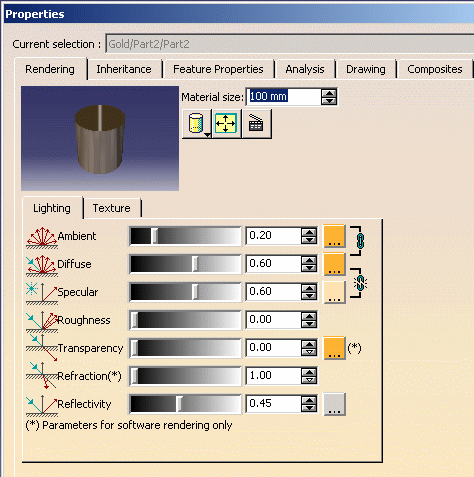
Right-click it then select Properties to
display the material properties:
-
Click Close.
-
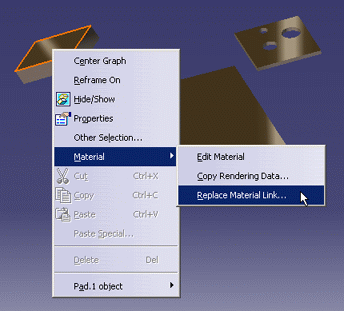
Right-click the first Gold material (which is a linked
material) in the specification tree then select Replace Material
Link... to open the Replace Link dialog box.
 |
the
Replace Link... dialog box can also be accessed by
right-clicking the object onto which the material has been applied,
then selecting Material > Replace Material
Link: |
 |
| This avoids selecting the material in
the specification tree and is especially useful when working in
Full Screen mode, for instance. |
 |
| The Replace Link dialog box
always opens the
default material catalog, whether it is the one provided by
Dassault Systèmes
or a user-defined catalog. |
-
Select a material from the list. By default, all
materials are displayed.
| However, you can use the list to sort materials by
family before selecting the desired material. |
|
In our example, we choose Floor in the
Construction family. |
-
Select the Propagate to all materials check
box if you want replace all occurrences of the selected material in all
products open in your session.
|
If you do not select this check box, the
replacement only occurs on the current product.
In our scenario, the check box is selected. |
-
Click OK to validate.
| The two Gold materials applied with a
link are replaced with the Floor material and the
product now looks like this: |
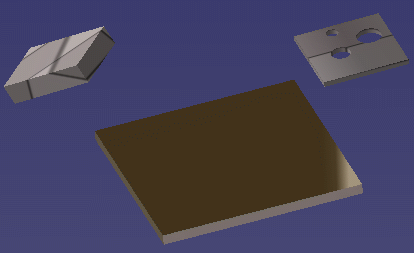 |
| Moreover, when looking at the specification tree
you see that only the linked materials have been replaced, the
Gold material applied without link is still applied onto one
of the parts. |
-
Now, access the material symbol in the specification
tree. You can see that it has changed from
 to to
 . The new
material has also been applied with a link to the material library. . The new
material has also been applied with a link to the material library.
-
Right-click the Floor material in the
specification tree then select Properties:
 |
| The properties now displayed are those of the
Floor material and not those of the Gold material
anymore. |
|