This task shows you how to render objects from any part or product workbench, thanks to the Rendering toolbar. Rendering of objects can be performed during the development stage.
-
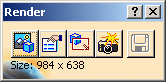
Click Rendering
 . The Render
dialog box is displayed.
. The Render
dialog box is displayed.
-
Click Select Scene
 .
The Scene dialog box is displayed with the Predefined
selected by default.
.
The Scene dialog box is displayed with the Predefined
selected by default.


- The Custom
allows you to
customize the scene as per your requirement.

The following options are available:- Default Lighting: It defines
the position, intensity, and shadows of the default
lights (Soft shadows give more realism to the lighting
but take more computing time). The following three
options are available:
- No Light: No light source is applied on the object.
- One Light: Only one light source is applied on the object.
- Two Lights: Two light
sources are applied on the object.
You can also change the illumination by moving the scroll bar.
- Background: Select this option to apply a background image. You can browse for an existing image by clicking Browse.
- Stretch Image: Allows you to stretch the image to cover the entire viewer. This option is selected by default provided the Background option is selected.
- Ground: It shows the horizontal ground in the 3D window. It also defines a plane where shadows cast by the model are drawn. The ground itself is not drawn, only the shadows on it are. This function is useful to better integrate the model in the background image.
- Transparency: Allows you to set the ground transparency to make the shadow less visible.
- Reflectivity: Allows you to set the reflectivity parameter to give a mirror effect to the ground.
- Default Lighting: It defines
the position, intensity, and shadows of the default
lights (Soft shadows give more realism to the lighting
but take more computing time). The following three
options are available:
-
-
Select the Default icon and click OK. The default background is applied to the image.
-
Next, click Rendering Options
 .
The Rendering Options dialog box is displayed.
.
The Rendering Options dialog box is displayed.

- Select the Quality of the object to be rendered. It defines the quality of the rendering (anti-aliasing, reflections, refractions).
- Select Realistic Lighting to provide a realistic soft shadowing. Surfaces not fully exposed are attenuated so that they do not receive the full contribution of the ambient lighting.
- Select the Resolution. It defines the image
resolution (i.e. size of the rendered image in pixels).
- Screen: Select this option to use the same resolution as the 3D viewer (one pixel in the 3D gives one rendered pixel).
- Custom: Select this option to define a ratio (one pixel in the 3D viewer gives more than one rendered pixel). This ratio is given in pixels per unit length. It allows you to have images larger than the screen resolution.
-
Click Define Rendered Area
 to define an area to be rendered. By default the whole area is chosen to
be rendered.
to define an area to be rendered. By default the whole area is chosen to
be rendered. -
Click Render
 . The
Computing dialog box is displayed.
. The
Computing dialog box is displayed.
Press Ctrl+R to start the rendering with current settings. 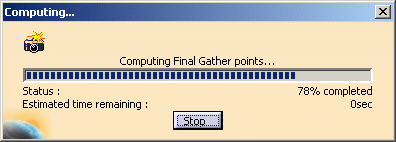
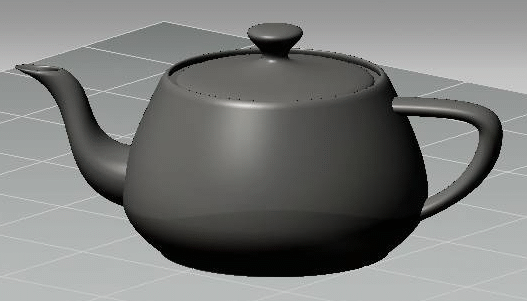
The image is rendered as shown below: 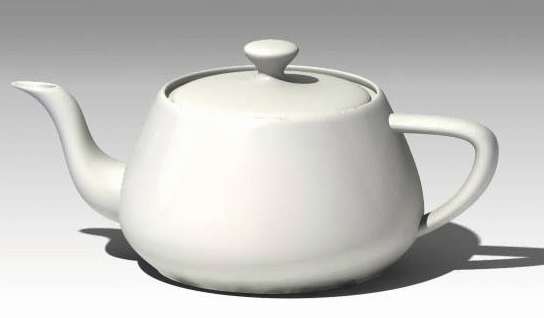
-
Click Save Image...
 to save the image at the desired location.