In this task you will learn how to browse the Scene catalog and instantiate its components.
Would you need further information about catalogs (creation, preview, query, and so on), please refer to the Version 5 - Component Catalog Editor User's Guide.
|
This default catalog is located in:
where OS is the
operating system, for example |
-
Open the Catalog Browser dialog box by clicking Catalog Browser
 .
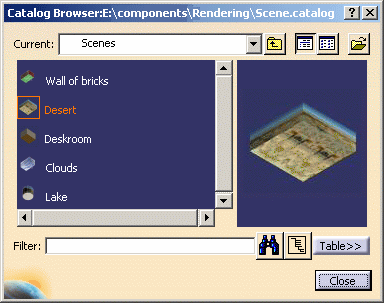
The Scene catalog opens:
.
The Scene catalog opens:
-
Double-click a family from the list to display its components.
-
Click the selected component to see its preview as shown below:
-
Click Table>> to show/hide the catalog descriptions and keywords. By default, the table is hidden.
Note: as far as shootings are concerned, many informations are provided in the Table such as the name, width and height of the computed image, texture, shadows, etc. 
No component is provided by default. You have to create the components to be taken into account for the shooting or drag and drop existing elements to include them in the catalog. 
- The
 button lets you perform a query using a filter.
 - The
 button lets you perform a query on multiple levels in your
catalog.
button lets you perform a query on multiple levels in your
catalog.
For detailed information on these two capabilities, refer to the "Making a Smart Query in a Catalog" in the Version 5 - Component Catalog Editor User's Guide. - The
-
Instantiate the desired element by double-clicking it. Then, you just have to adapt the instantiated element to your product. In the example below, the environment dimensions have been slightly modified so that the scene looks more realistic:
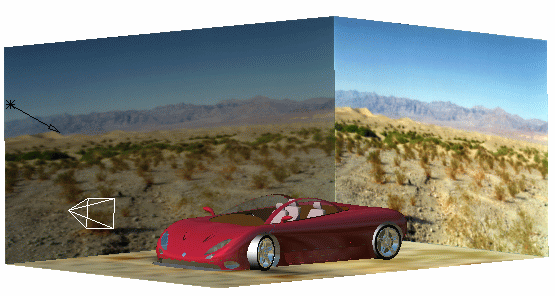
Picture 1 - Desert scene instantiation 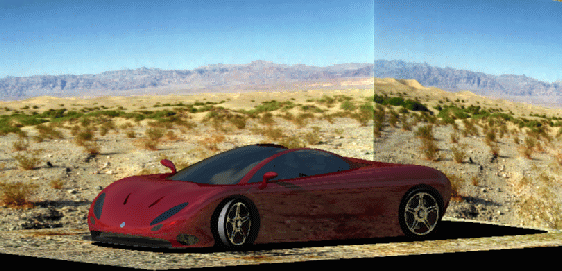
Picture 2 - Quick render of Desert scene
You can also select Copy > Paste or drag and drop the element directly onto the product in the specification tree.
![]()