-
Open the KwrStartDocument.CATPart document.
-
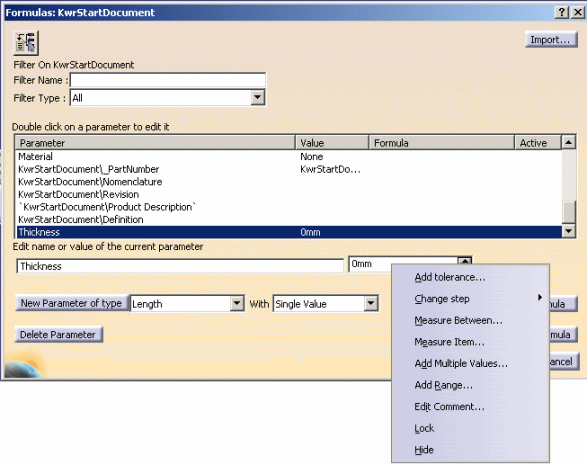
Click Formula (
 ). The f(x) dialog box is
displayed.
). The f(x) dialog box is
displayed. -
Select the Length item with Single Value from the New Parameter of type list, then click New Parameter of type.
The new parameter appears in the Edit name or value of the current parameter field. -
Replace Length.1 with Thickness, then right-click in the value field of Edit name or value of the current parameter.
-
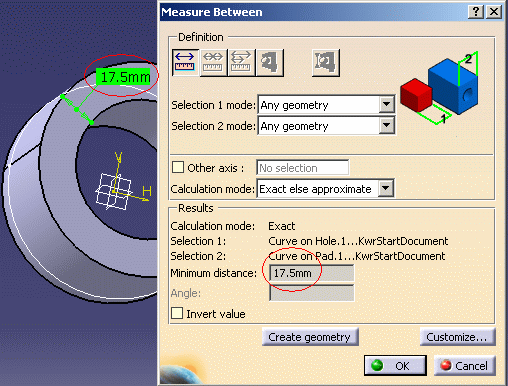
Select Measure Between... from the contextual menu. The Measure Between dialog box is displayed. Select Edge only as Selection 1 mode and Edge only as Selection 2 mode.
-
In the document geometry area, select successively one of the inner circular edges of the part, then the outer circular edge located on the same face. The 17.5 mm value is displayed in the Measure Between dialog box.
-
Click OK when done in the Measure Between dialog box. The 17.5 mm value is displayed in the Formulas dialog box.
-
Click OK to close the Formulas dialog box.
| The parameter is displayed below the
Measure node in the specification tree and below the Parameters node. To edit this parameter:
|
 |